What is StorX?
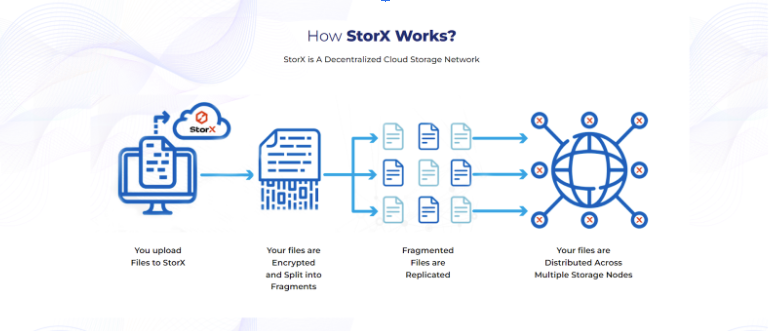
StorX is a Decentralize Cloud Storage Network designed for secure and reliable file storage, featuring inherent economic incentives and cryptographic mechanisms to ensure highest privacy and security of stored data over time. In StorX Network, users make payments to store their files with Independent Storage Node Operators, which are responsible for securely storing and validating the correctness of stored files over time. Anyone interested in either storing their own files or earning compensation for storing others' files can participate in the StorX Network Ecosystem. Using an already available Storage Capacity helps StorX to keep the cost for Storage Low compared to other centralized players in market.
StorX supports various use cases, ranging from Backups / Web2 /Web3 assets to incentivized permanent storage and cost-effective archiving of Web2 datasets as an alternative to traditional cloud storage. StorX accommodates a diverse array of data formats, including audio and video files.
How Storage Works
In StorX Ecosystem, users can rent out their storage capacity to the network in exchange for StorX Tokens (SRX), the platform's native cryptocurrency. These tokens are also used within the StorX Network for retrieval services and payment for storage.
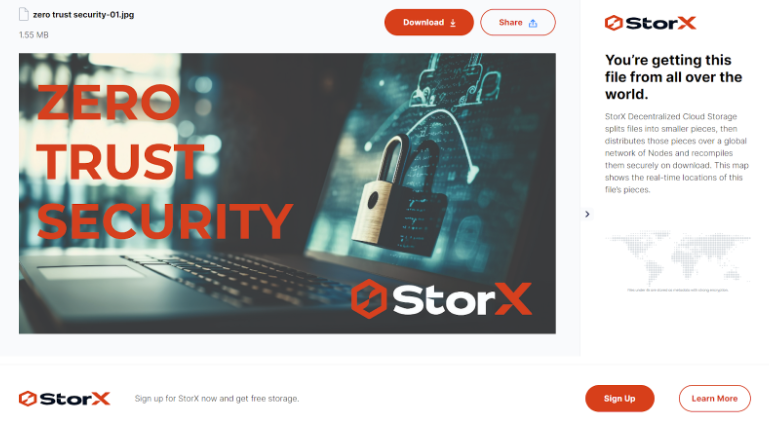
A key technical innovation is the implementation of Erasure coding (EC) , This technique ensures encrypted files are broken down into smaller pieces and distributes them across multiple nodes in the network, ensuring data durability and high availability through redundancy.
Let’s dive into the comprehensive exploration of StorX Networks, your gateway to decentralized cloud storage. In this guide, we'll delve into the step-by-step process of utilizing StorX, a revolutionary platform that combines blockchain technology, a decentralized network, and cutting-edge storage solutions. From understanding the fundamentals to navigating through the features, this exploration will equip you with the knowledge to effectively leverage StorX for your decentralized storage needs.
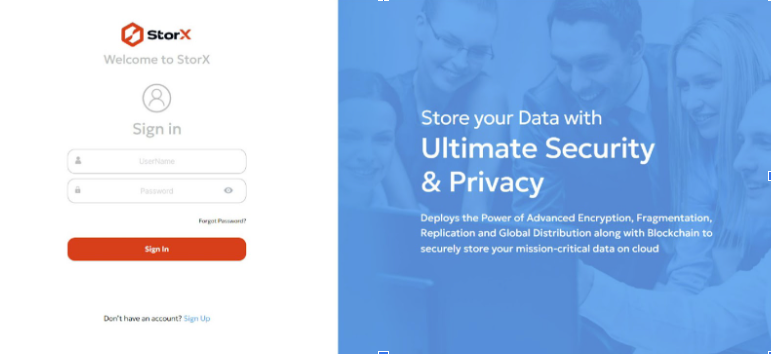
Sign in to StorX
On the StorX Login page, select the login option that matches your registered account type. Then, choose the correct security question and provide its answer.
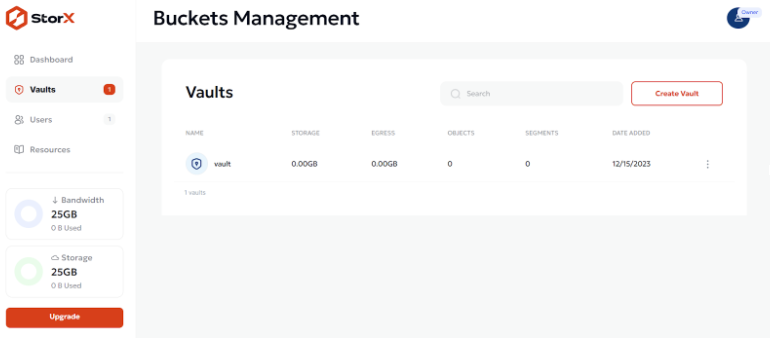
Dashboard
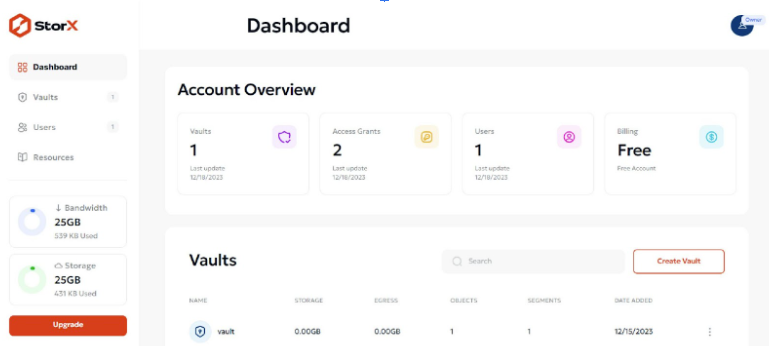
Upon successful login, you will be directed to the StorX dashboard. Here, you’ll find an account overview (including vault count, access grants, and billing type), a list of your vaults, and detailed bandwidth/storage stats.You can also click any option in the sidebar to navigate to specific sections for more details.
Creating a Vault
StorX employs a vault-based methodology for systematic file storage. All files must be stored within a vault, and users can create an unlimited number of vaults as needed. Within each vault, you can organize content by creating folders and storing individual files. Please note that vault names must adhere to specific naming conventions: they should be alphanumeric (Enter lowercase alphanumeric characters only no spaces allowed).
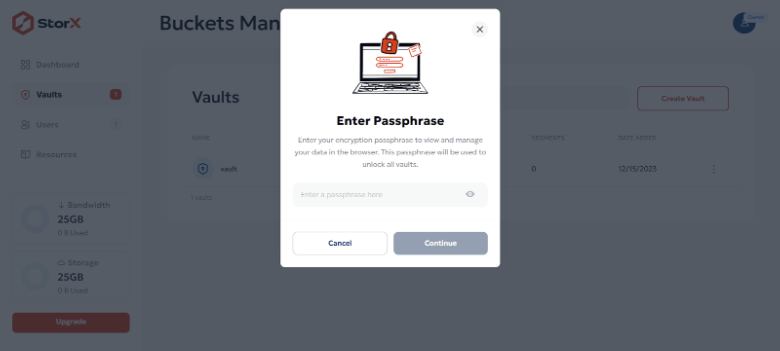
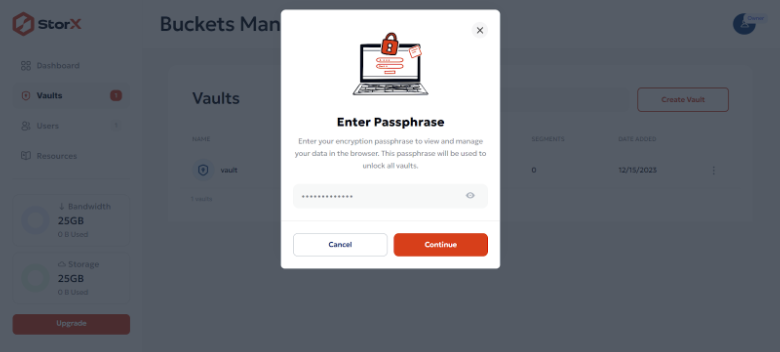
Accessing Vault and more
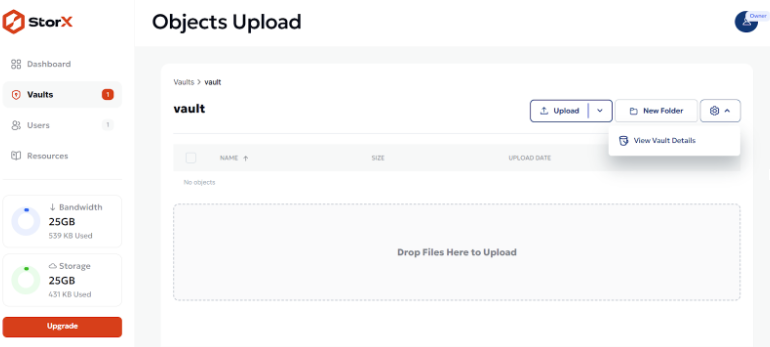
Once your vault is successfully created, you can select it to access its detail page. From here, you’ll be able to perform various operations, such as uploading individual files, uploading entire folders, or creating new folders. To simplify the process, StorX also supports drag-and-drop functionality for seamless file and folder uploads, making the experience both efficient and user-friendly.
On the Vault Detail page, click the gear icon dropdown menu and select 'View Vault Details' to access comprehensive information about your vault. This will display key details including the vault's creation date, last updated timestamp, and the total count of objects stored within it.
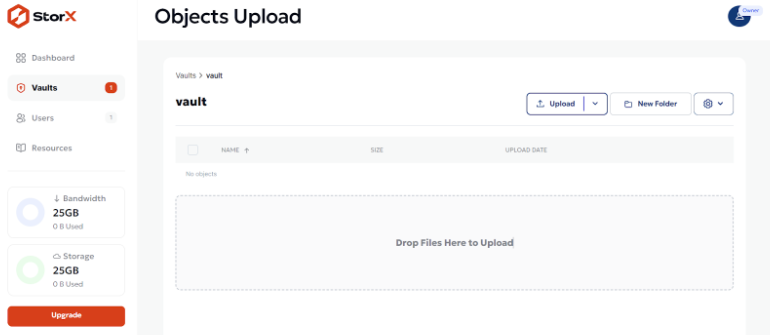
Uploading your file to the Vault
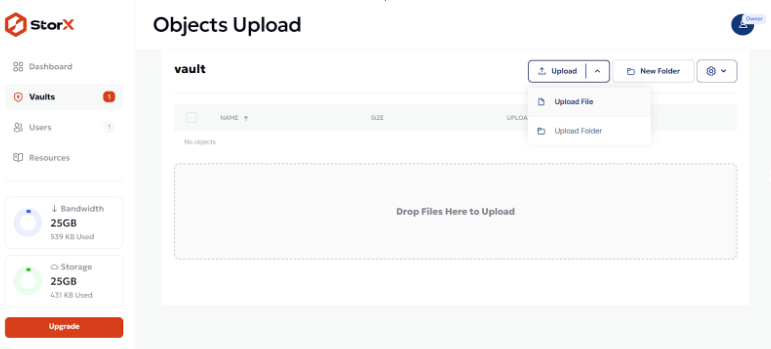
Once you are in Vault Detail page you can upload a file or upload a folder by clicking on the upload button dropdown menu and select what you want to upload File or Folder based on your choice.
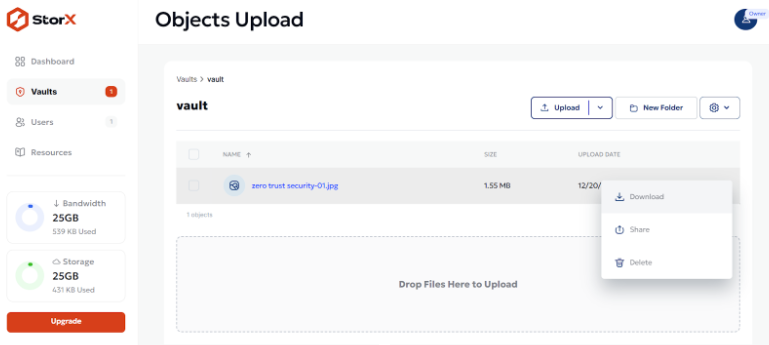
Once the file or folder is uploaded or a folder is added in the vaults you will have access to following options related to sharing the file or folders, Downloading the file or folder, Publishing the file or folder as well if not required the option to delete the file or folder.
Sharing your Vault
In the Vault listing page select the vault you want to share by clicking on the 3-dot menu bar in the left of the vault list. Here select the option to share the vault and set the parameters as per your choice.
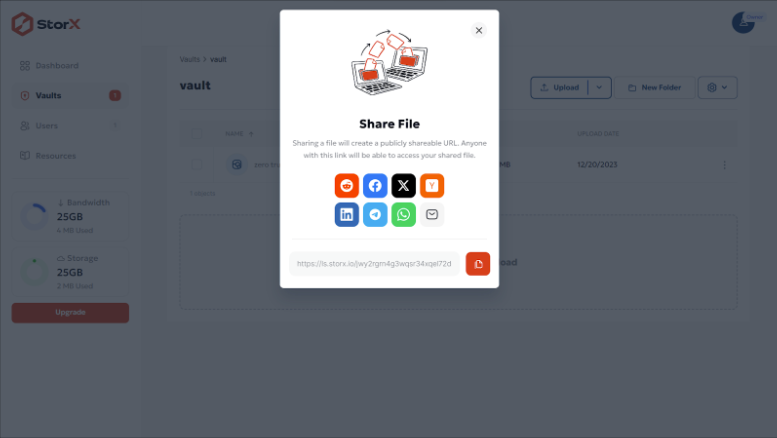
This is what the generated link looks like when its sent to someone to download the file:
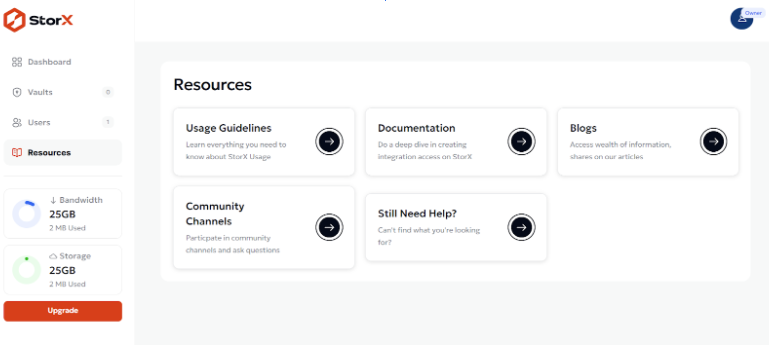
Resources
For more information about StorX usage guidelines, upcoming updates, or to share enhancement suggestions, issues, or feedback, navigate to the 'Resources' section in the sidebar menu of your dashboard. Here, you can explore all StorX-related documentation and communication channels.