Setup StorX Storage Node Using the shell-script
- Setup StorX Storage Node | Bootstrap Script
- Starting StorX Storage Node | Start-node Script
- Stopping StorX Storage Node | Stop-node Script
- Upgrading StorX Storage Node | Upgrading node Script
- Validating the set is successfully running
- Stake SRX token
-
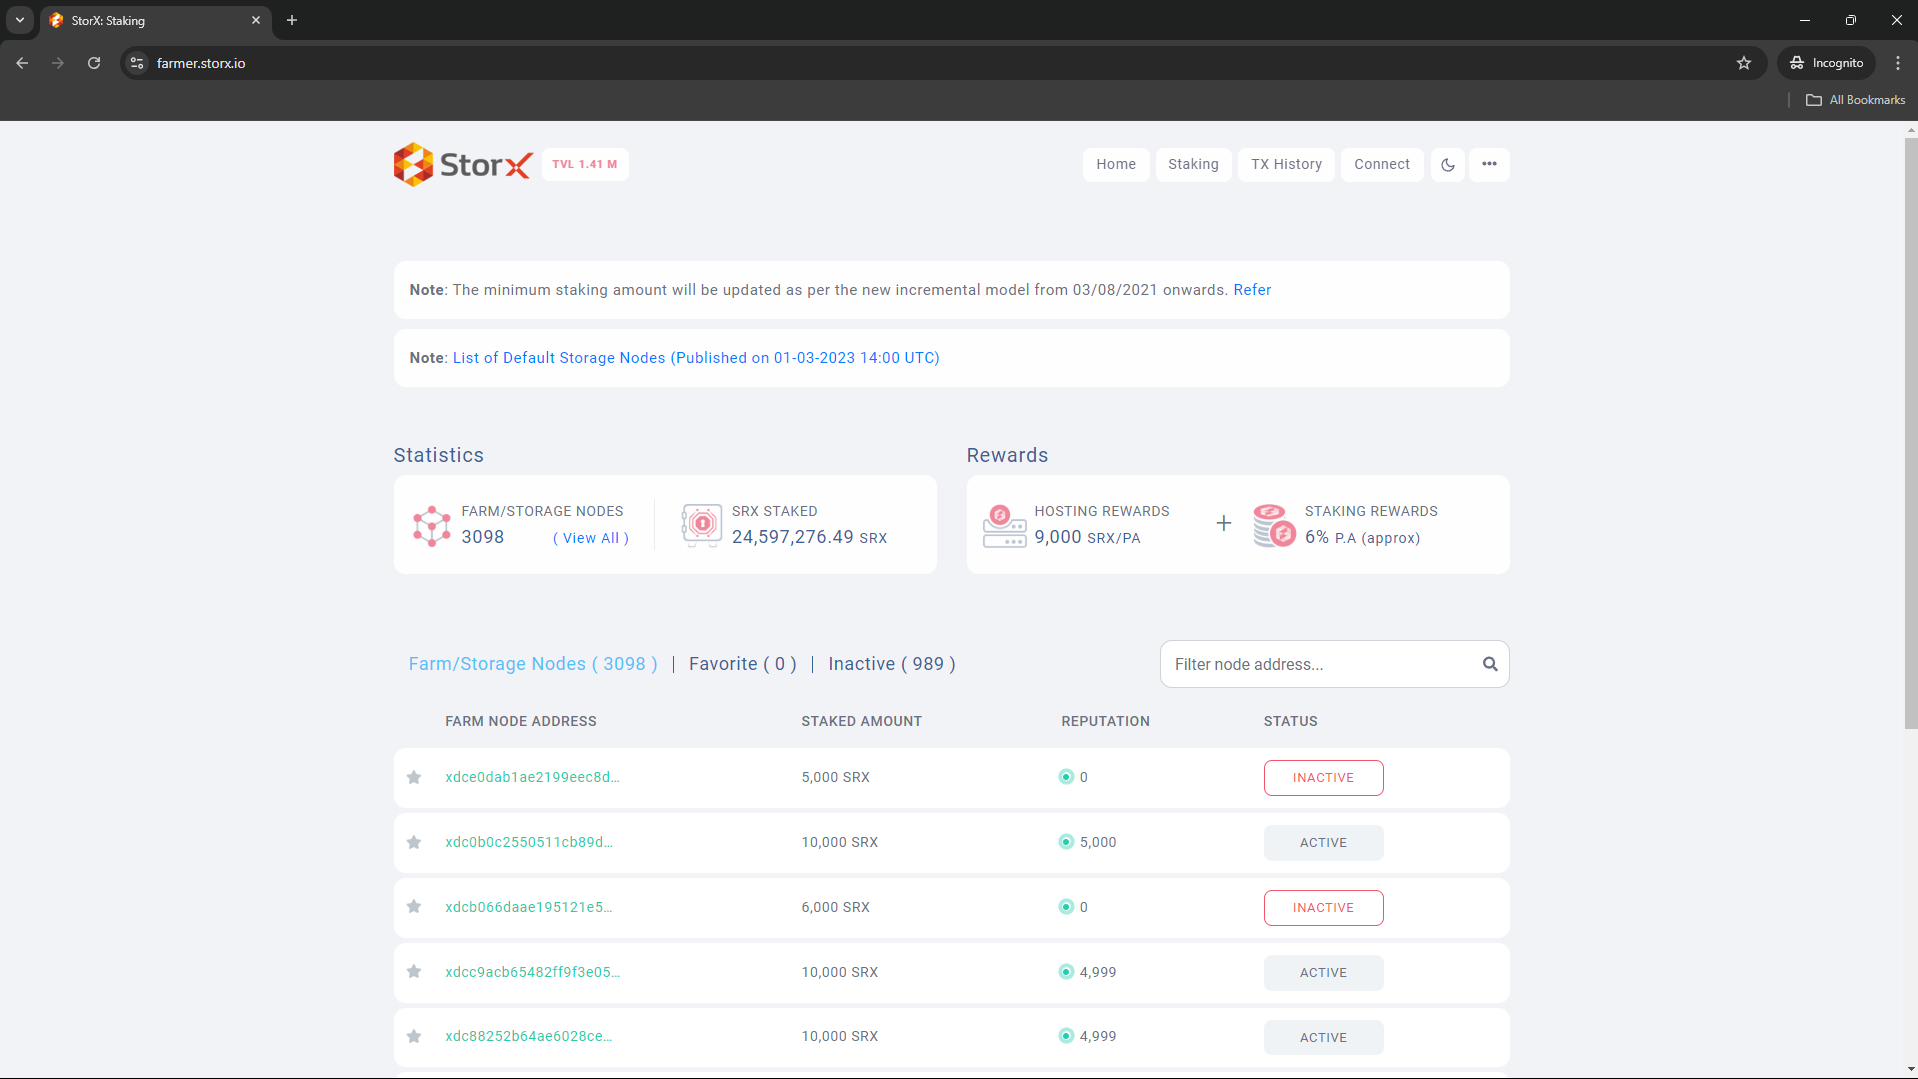
Once the node is set up, you can check the status of the node setup on this https://farmer.storx.io/.
-
Once you are navigated to the https://farmer.storx.io/.
-
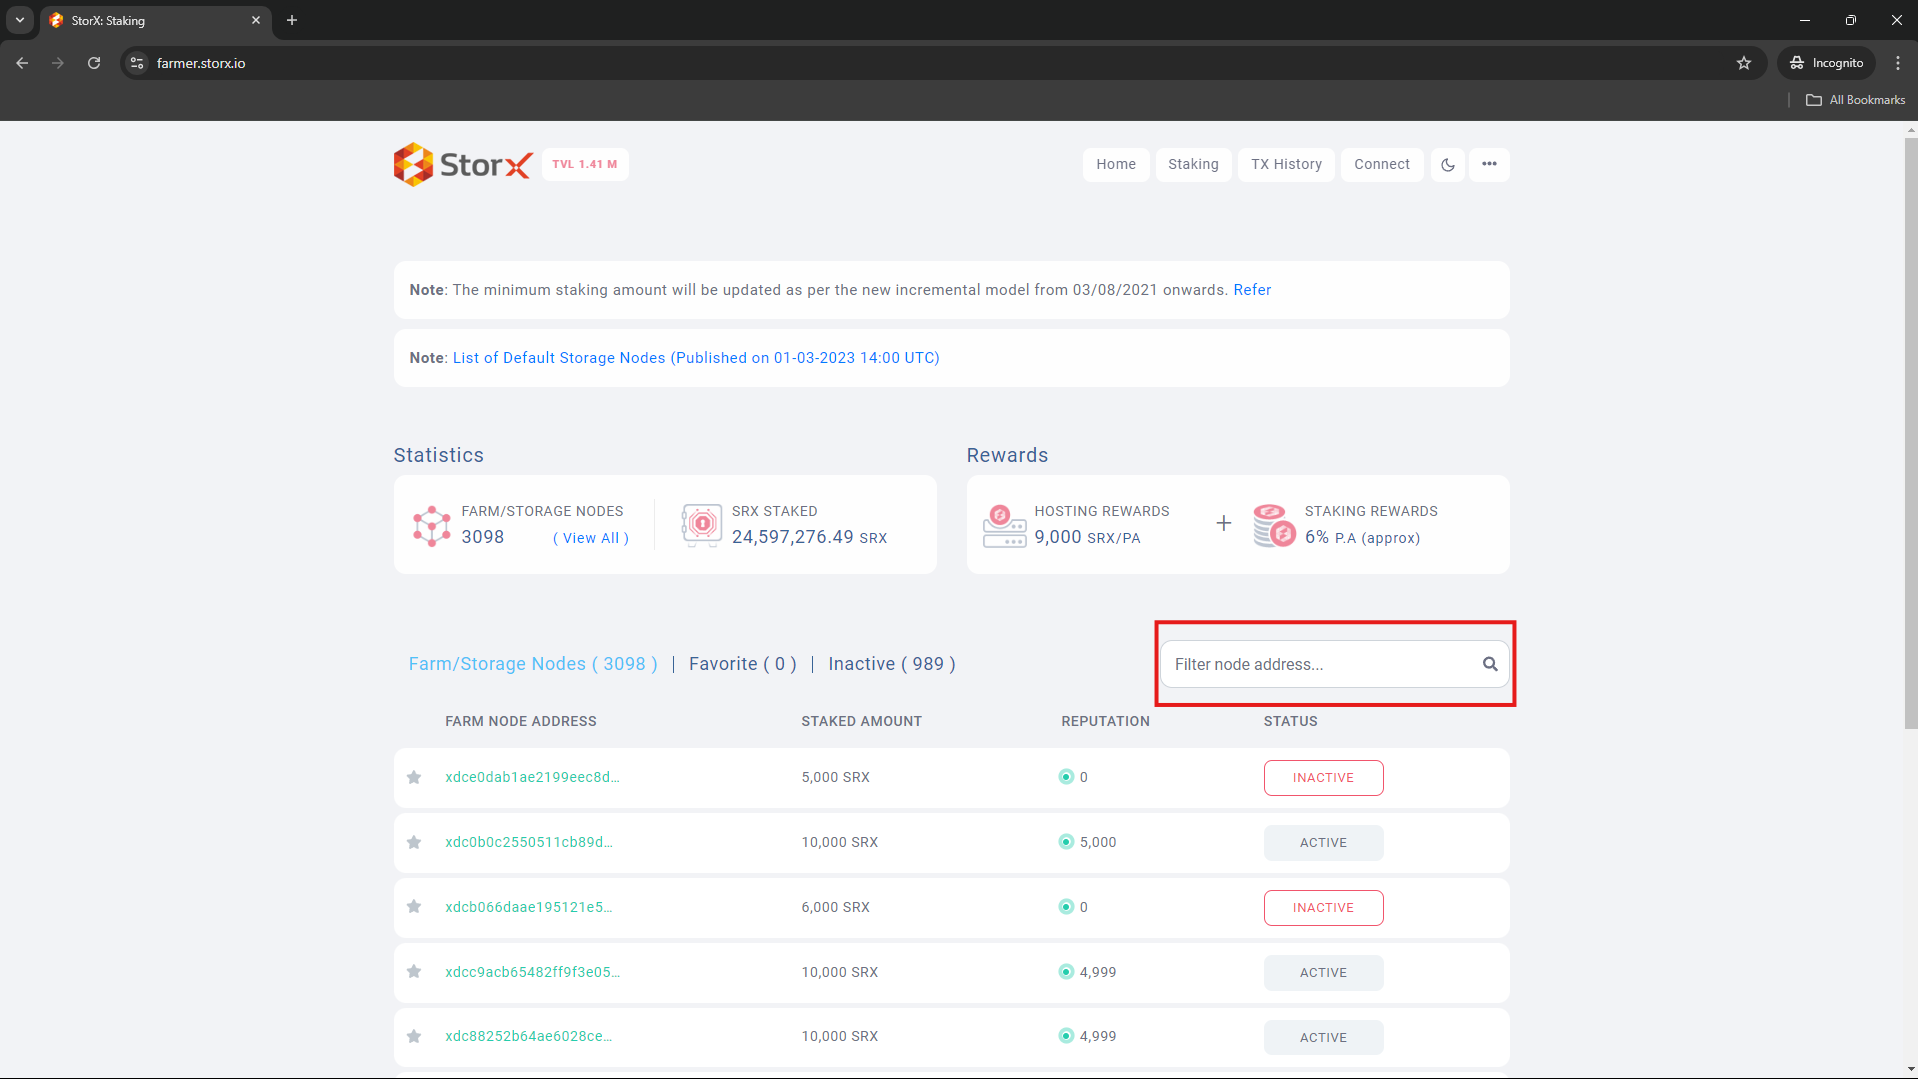
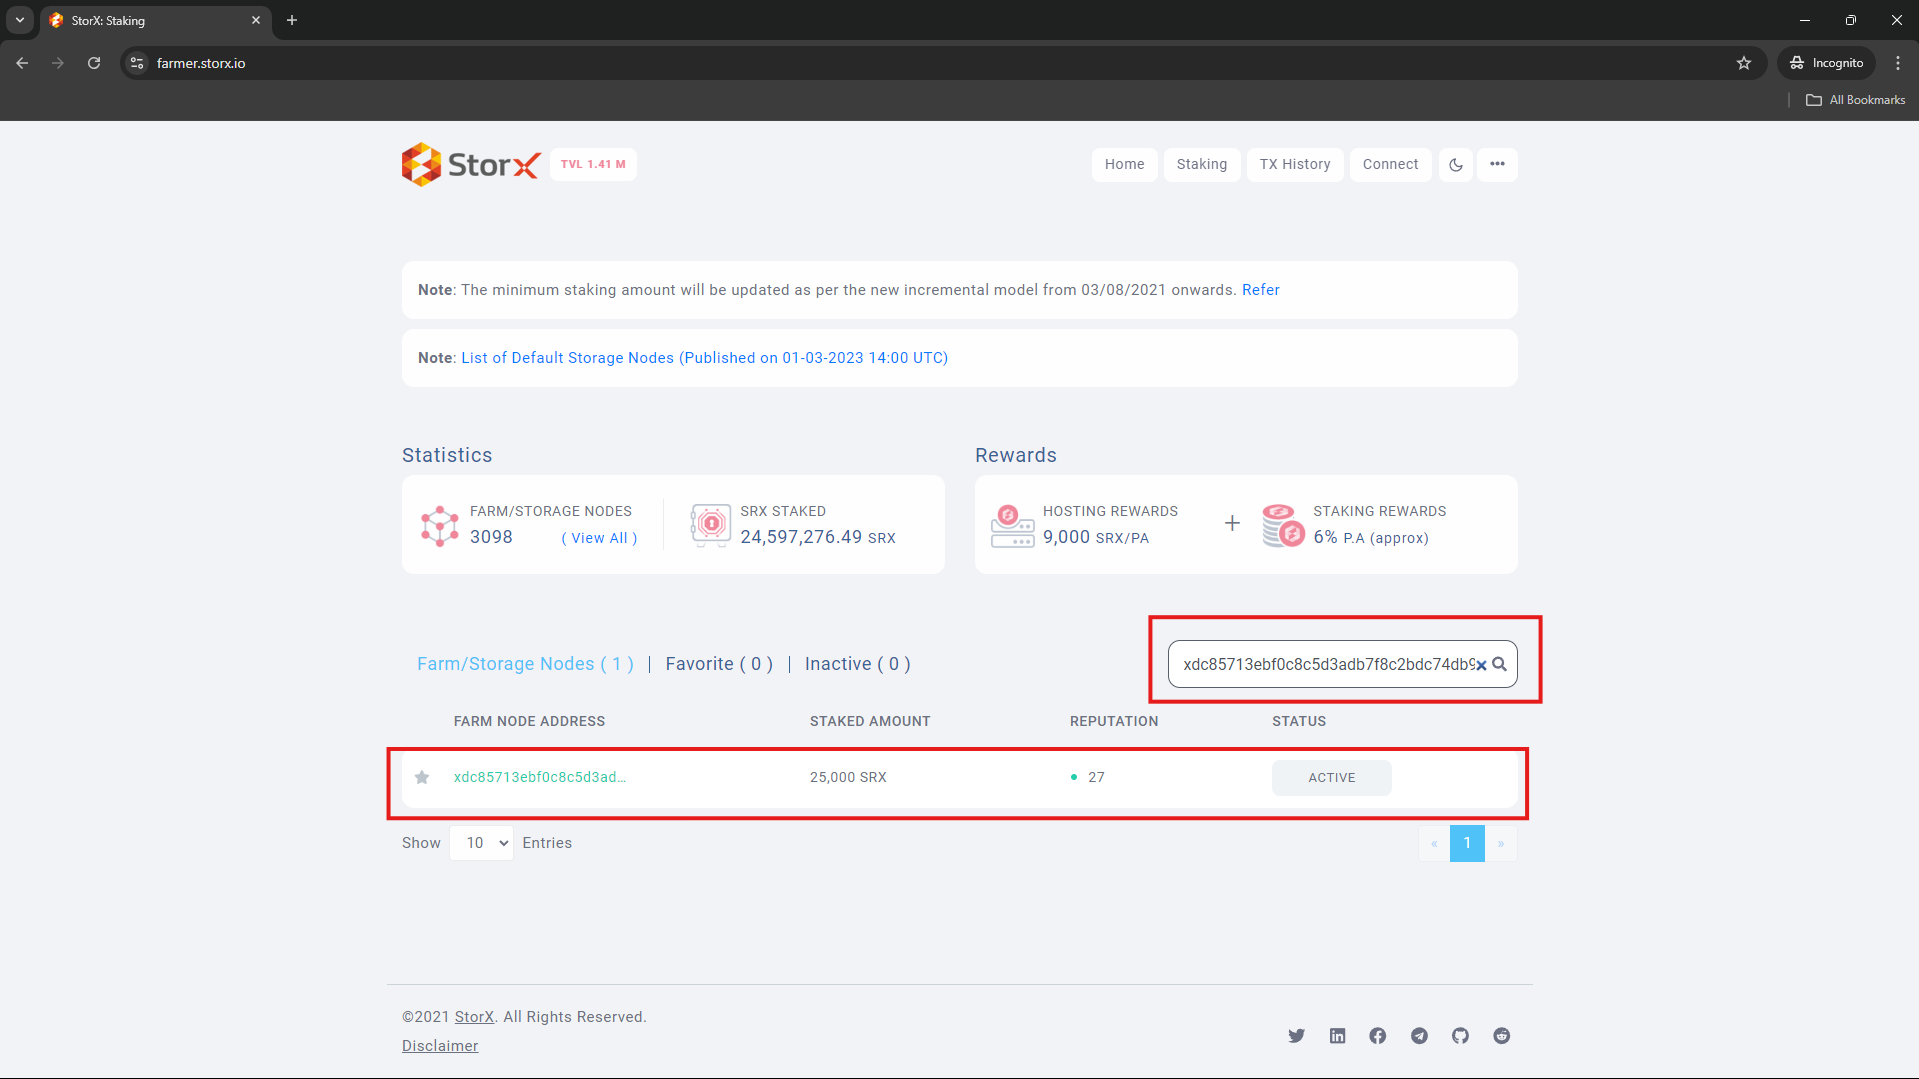
Enter your wallet id into the search bar.
-
Now you will be able to check the status of the node you deployed.
-
After setting up StorageNode please Stake SRX token from the URL : https://farmer.storx.io/
-
IMP Note : You have to stake SRX token to get hosting and staking rewards.
- Troubleshooting
-
Public discussions on the technical issues, post articles and request for Enhancements and Technical Contributions.
Step 1 : - You need to clone the git repository using the below commands to get started. sudo su -c "bash <(wget -qO- https://raw.githubusercontent.com/StorXNetwork/Storage-Node/main/clone_repo.sh)" root
Or Use the git clone command "git clone https://github.com/StorXNetwork/Storage-Node.git" and copy it into the terminal.
Step 2 : - Once you have cloned the repository you can perform the check if the clone is done successfully using the “ls | grep Storage-Node” command you should be able to list the file named Storage-Node as below.
Step 3 : - Now we can resume from step 1 you need to change the directory to start working with us. Use the below command to change the directory “cd Storage-Node”.
Step 4 : - Run the command “sudo bash bootstrap.sh”. Once you run this command you will be asked for the Wallet id, Email id and the IP address. This process may take time until you can continue as further set up process requires the Identity creation.
Note :-- Provide the valid details.
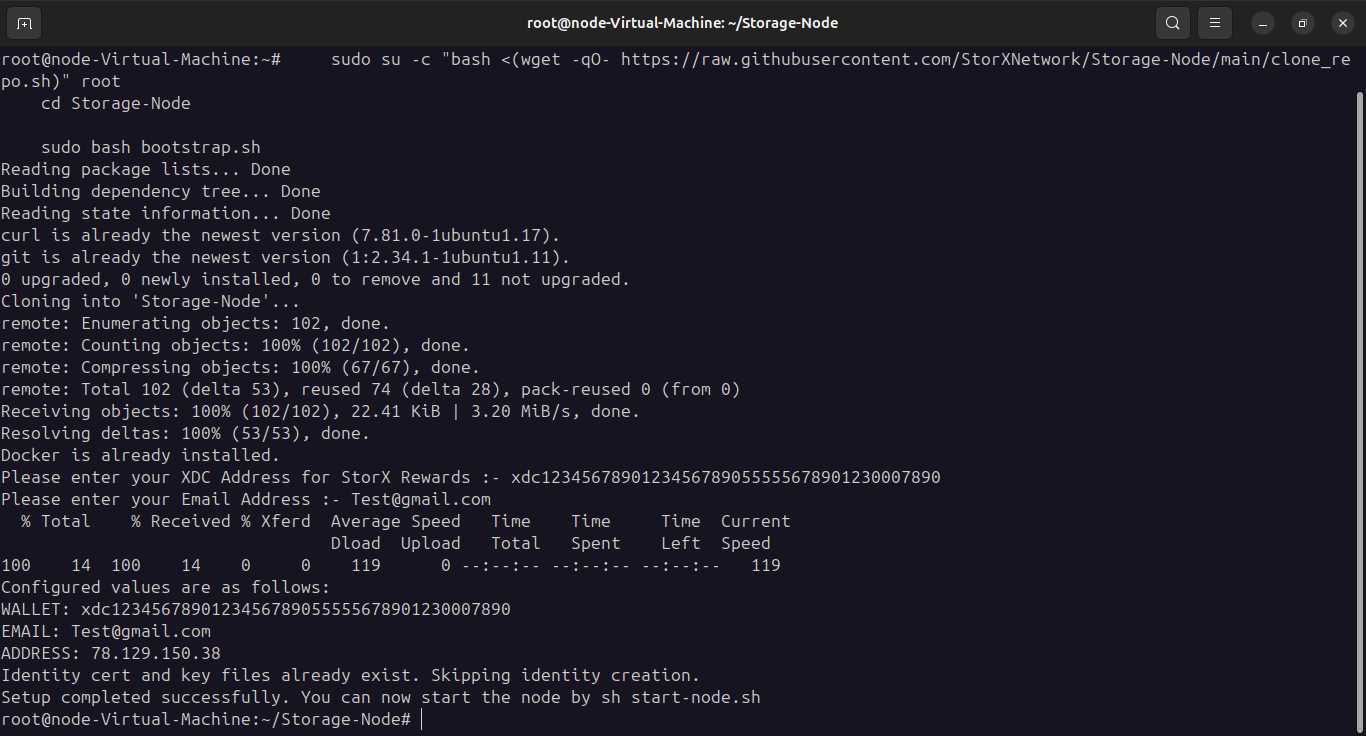

Step 5 : - Trying to run the “sudo bash bootstrap.sh” command again before the Identity creation will throw the error as “Identity creation is already running in the background. Please wait for it to finish.”

Step 6 : - On completion of the identity creation you will be able to see the following message “Setup completed successfully. You can now start the node by sh sudo bash start-node.sh”.

Step 7 : - Once you have created the Identity Creation you can inspect using the below command “ps -ef | grep ide”.
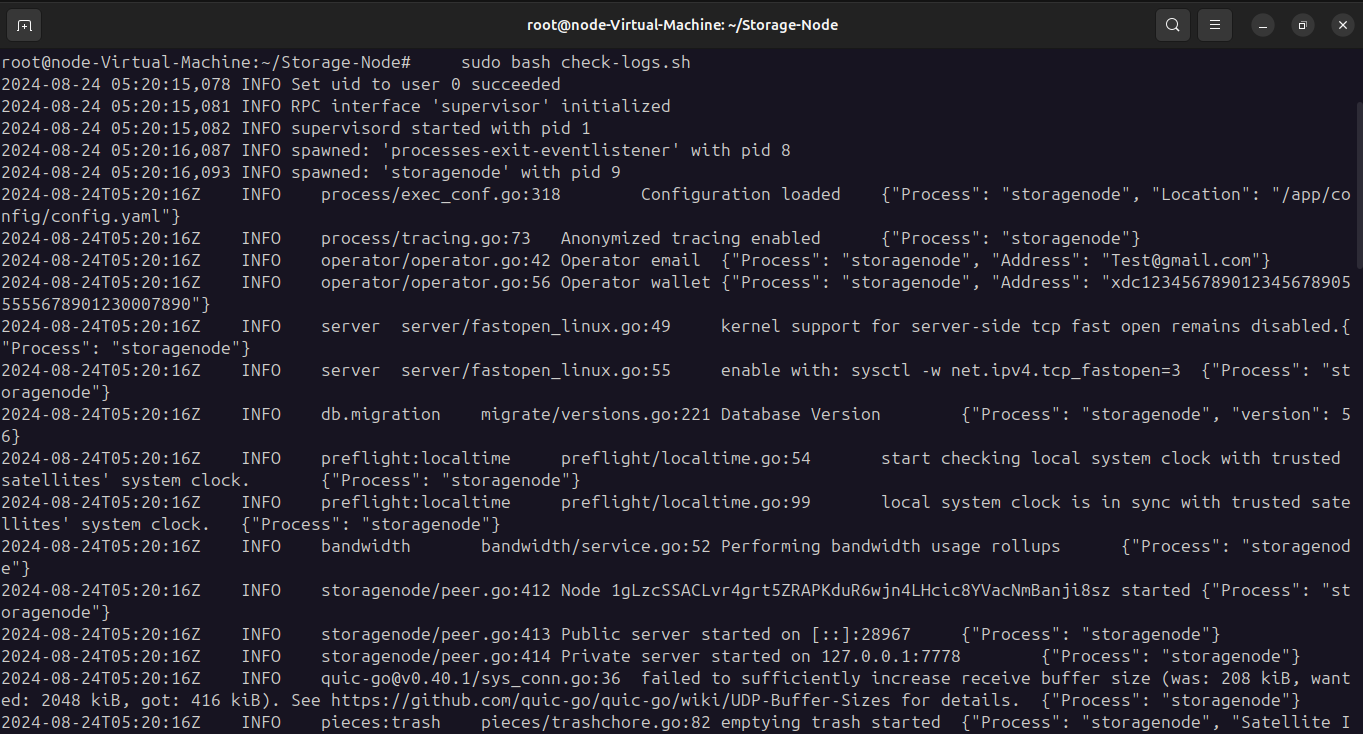
For MainNet Step 1 : - Once you have done the docker installation and Identity creation followed by the directories creation now you can start working with the node using the following command “sudo bash start-node.sh”.

Step 2 : - You can check the node is started using the command "sudo bash check-logs.sh".
Step 1 : - You can stop the node using the command “sudo bash stop-node.sh”.

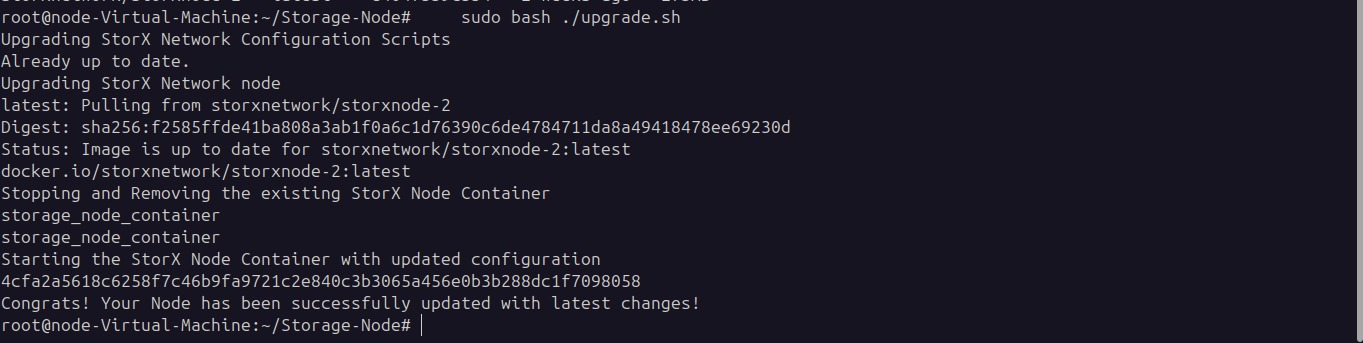
For the user who has already set up the node in the server you can update the node using the below command.
Step 1 : - The following command will update the file completely so the service is not hampered. “sudo bash ./upgrade.sh”.
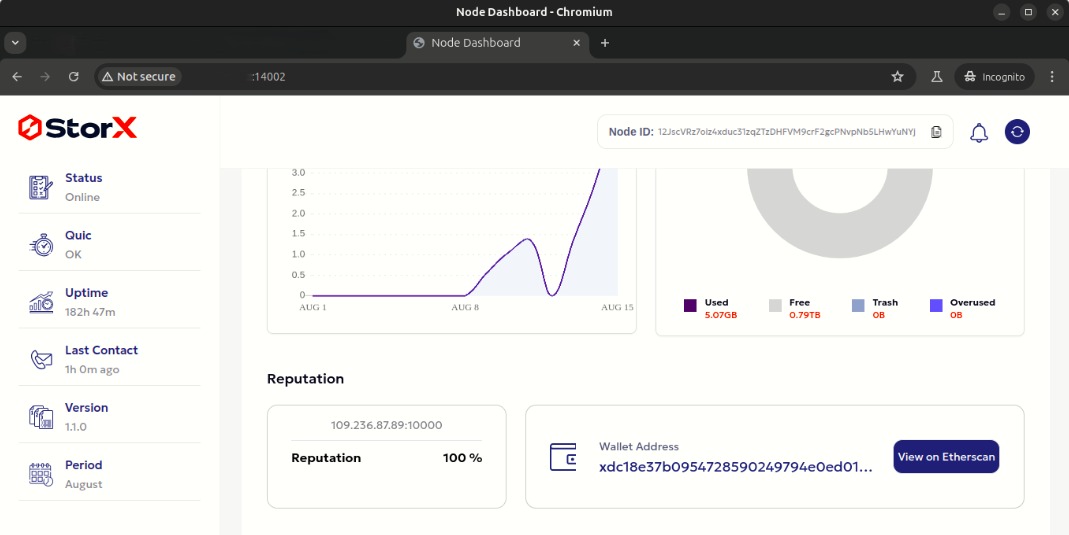
Step 1 : - Open the browser and enter the below in the URL. To Get started. URL : http://“Enter_your_IP_Address”:14002